As the cooler temperatures arrive and the growing season winds down, it’s time to think about winterizing your lawn mower. Storing your mower correctly during winter is important to guarantee that you will be able to start it up easily next season. Skipping this step can lead to expensive repairs and possibly a mower that won’t start when you need it. Winterizing is the process of making sure all the parts of the equipment are clean, in good working condition and covered. Here’s a step-by-step guide on how to winterize your lawn mower and keep it in top shape for the next season.
Why Winterizing Your Lawn Mower Matters?
Lawn mowers are not cheap tools, and ensuring their longevity is crucial. Leaving your mower idle over the winter can cause it to rust, break, or be otherwise damaged in ways that can be expensive to repair.
Fuel degradation: The problem with gasoline is that it can turn stale after a few weeks and this can cause it to thicken and clog the carburetor and fuel lines and this will lead to hard starting and misfires in the spring.
Corrosion: Your mower’s metal parts can rust and corrode if exposed to moisture and varying temperatures of the environment.
Oil contamination: The oil that is used in your mower’s engine may become contaminated or may thicken and this will damage the internal parts of the engine.
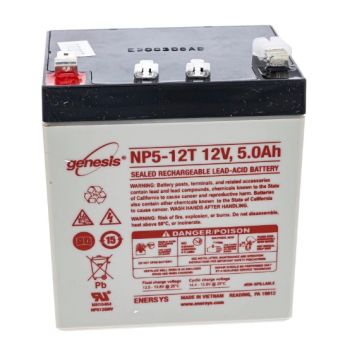
Battery problems: If you have a battery operated mower, it is advisable not to leave the battery in the cold for several months as it will end up being a dead or damaged lawn mower batteries.
It is very easy to avoid these problems and prepare your lawn mower for the next season if you follow these few steps.
How to Winterize Lawn Mowers?
Winterizing your lawn mower is essential because it helps preserve the life of the engine and ensures that your mower operates efficiently the next time you use it. During the colder months, fuel can degrade, parts can rust, and debris can accumulate, all of which could lead to damage. Winterizing prevents such issues, making it easier to get your mower up and running when spring arrives.
1. Empty the Lawn Mower Gas Tank
The first step in winterizing your mower is to address the lawn mower fuel tank. If you leave gasoline in the mower over the winter, it can break down and turn into varnish, clogging the fuel lines, carburetor, and engine. To avoid this, you should empty the gas tank before storing it for the season.
How to Empty the Gas Tank:
Run the mower until the tank is nearly empty. This allows the engine to use up the fuel.
If there’s any remaining fuel in the tank, carefully siphon it out into a gas can for future use.
Alternatively, you can use a fuel stabilizer. If you don’t want to drain the tank, add a stabilizer to the remaining fuel to help prevent it from breaking down over the winter. Follow the manufacturer’s instructions on how much stabilizer to add, then run the mower for a few minutes to ensure the stabilizer mixes with the gas.
2. Disconnect and Inspect the Mower Spark Plug
The spark plug is one of the most vital parts of your lawn mower's ignition system. A spark plug that’s in poor condition can lead to starting issues in the spring. Disconnecting the spark plug before working on the mower will help prevent any accidental starting while you perform maintenance.
How to Disconnect and Inspect the Spark Plug:
Start by disconnecting the spark plug wire. Gently pull the wire off the spark plug to avoid damaging the connection.
Use a socket wrench to remove the spark plug from the engine.
Inspect the spark plug for signs of wear or damage. Look for oil residue, corrosion, or worn electrodes.
If the spark plug looks worn, it’s best to replace it with a new one. A clean, functioning spark plug is essential for reliable starting in the spring.
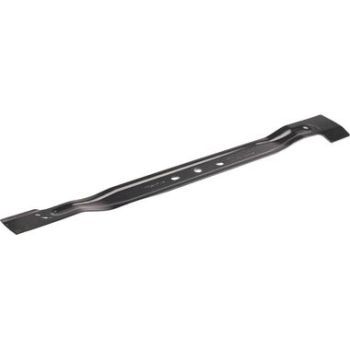
3. Remove and Sharpen the Lawn Mower Blade
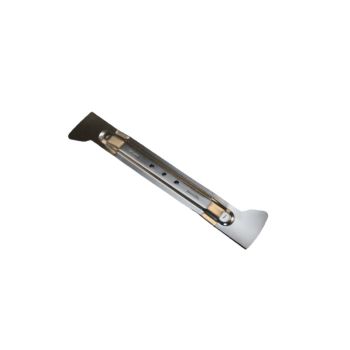
The mower blade is responsible for cutting your grass, and over time, it can become dull or nicked. A sharp blade ensures a cleaner cut, which is healthier for your lawn. Before storing your mower, remove and sharpen the blade to keep it in excellent condition for the next season.
How to Remove and Sharpen the Mower Blade:
First, lift the mower and secure it. You may need a block or stand to stabilize it.
Using a socket wrench, remove the bolts that secure the blade to the mower.
Once the blade is removed, clean it thoroughly to remove any dirt or grass clippings. This will make the sharpening process easier.
Use a sharpening stone, metal file, or power grinder to sharpen the edges of the blade. Be sure to maintain the original angle of the blade, typically between 30 and 45 degrees.
After sharpening, balance the blade to ensure even cutting. A balanced blade will prevent the mower from vibrating during operation, which can damage the engine.
Reattach the sharpened blade securely to the mower, ensuring the bolts are tight.
4. Drain the Oil From Your Mower
Over time, the oil in your lawn mower can become contaminated with dirt, debris, and other particles. Draining and replacing the oil before storing your mower will help prevent engine wear and corrosion during the winter months.
How to Drain the Oil:
Start by running the mower for a few minutes to warm up the engine. Warm oil drains more easily and completely.
Place a container beneath the oil drain plug to catch the used oil.
Use a wrench to remove the oil drain plug, allowing the oil to flow out. If your mower doesn’t have a drain plug, you can tilt it sideways to drain the oil into a container.
Once the oil has drained completely, replace the drain plug and prepare to refill the mower with fresh oil in the next step.
Clean the Mower Undercarriage
Grass clippings, dirt, and other debris can accumulate under your mower deck, potentially affecting performance and leading to rust over time. Cleaning the undercarriage helps to prevent these issues and extends the life of the mower.
How to Clean the Mower Undercarriage:
Use a high-pressure hose or a scraper to remove any accumulated grass, dirt, or leaves from beneath the mower deck.
Take care not to damage the deck with the scraper. If using a hose, avoid direct spraying at electrical parts or the air filter.
You can also use a putty knife or wire brush to get rid of stubborn clippings that have become caked onto the deck.
After cleaning, dry the undercarriage with a cloth to prevent moisture buildup, which can lead to rust.
6. Reattach the Mower Blade and Refill the Oil Tank
Now that the blade is sharpened and the mower’s oil has been drained, it’s time to reassemble and refill the mower. Ensuring that all components are in place and properly maintained will make your mower ready for storage.
How to Reattach the Blade and Refill the Oil:
Reattach the sharpened blade to the mower deck. Ensure that it’s secured tightly with the appropriate bolts or screws.
Refill the oil tank with fresh oil that is recommended for your specific mower. Always check the owner’s manual for the correct type and quantity of oil.
Be sure to use the right oil, as using the wrong type can lead to engine damage over time.
7. Replace the Lawn Mower Air Filter
The air filter is responsible for ensuring that clean air flows into the engine. A clogged or dirty air filter can reduce engine efficiency and lead to starting problems. Replacing the air filter at the end of the season can prevent dust and dirt from accumulating inside the engine, making it easier for your mower to start in the spring.
How to Replace the Air Filter:
Locate the air filter cover, which is typically found near the carburetor.
Remove the cover and take out the old air filter. Inspect it to see if it’s clogged with dirt, oil, or debris.
If the filter is dirty, replace it with a new one. You can buy replacement air filters from most hardware stores or directly from the mower’s manufacturer.
Install the new air filter and replace the cover, ensuring it’s securely fastened.
8. Install a New Spark Plug in Your Mower
The spark plug plays a vital role in the mower’s ignition system. Replacing the spark plug annually ensures the engine starts easily and runs smoothly throughout the season. If you didn’t replace the spark plug earlier in the process, now is the time to do so.
How to Install a New Spark Plug:
Choose a spark plug that is compatible with your mower model. Check the owner’s manual for the correct spark plug specifications.
Insert the new spark plug into the engine by hand, then use a socket wrench to tighten it securely.
Reattach the spark plug wire to the spark plug.
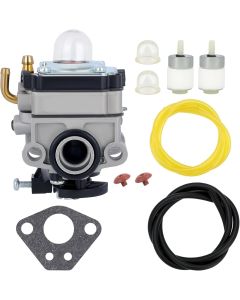
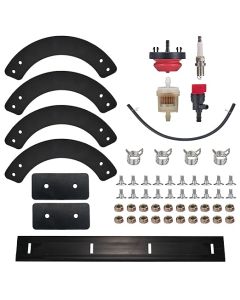
At WholeToolBox, we offer a wide selection of high-quality lawn mower parts to keep your equipment running smoothly. Whether you need replacement blades, air filters, spark plugs, fuel filters, or carburetors, we’ve got you covered. Our parts are durable, reliable, and designed to fit most major mower brands.
Additional Lawn Mower Winterizing Tips
In addition to these essential steps, there are a few more things you can do to ensure your mower stays in good shape during the winter months.
Storage Location:
Store your lawn mower in a dry, sheltered place such as a shed, garage, or basement. Avoid leaving it outside where it can be exposed to rain, snow, and extreme cold.
If space is limited, you can use a tarp to cover the mower, but make sure it is properly ventilated to avoid moisture buildup.
Battery Maintenance (for Electric and Battery-Powered Mowers):
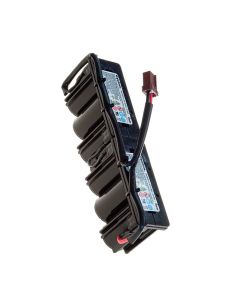
If you own an electric or battery-powered mower, remove the battery before storing it for the winter. Keep it in a cool, dry place and ensure it’s fully charged to extend its lifespan.
Check the manufacturer’s guidelines for battery maintenance, as some
Winterizing your lawn mower is an essential maintenance task that can save you time, money, and frustration in the spring. By following these steps—emptying the gas tank, disconnecting and inspecting the spark plug, sharpening the blade, draining the oil, cleaning the undercarriage, and replacing essential components like the air filter and spark plug—you’ll ensure that your mower is well-prepared for the off-season.
Taking the time to perform these tasks will not only extend the life of your lawn mower but also make it easier to get back to mowing once the warmer weather returns. With a well-winterized mower, you’ll be ready to tackle your lawn care duties with ease and efficiency when spring rolls around.
FAQs
Is it okay to leave gas in a lawn mower over winter?
It’s not ideal to leave gas in a lawn mower over winter as it can degrade, causing starting issues. Use a fuel stabilizer or empty the tank completely.
How to properly winterize a lawn mower?
Winterizing a lawn mower involves cleaning it, changing the oil, removing or stabilizing the gas, sharpening the blades, and storing it in a dry place.
Is it okay to hose down a lawn mower?
Yes, you can hose down a lawn mower, but ensure it’s dried thoroughly to prevent rust. Avoid spraying the engine directly with water.
Should I remove the lawn mower battery for winter?
Yes, remove the battery and store it in a cool, dry place to prevent damage from cold temperatures and ensure it lasts longer.






Validate your login